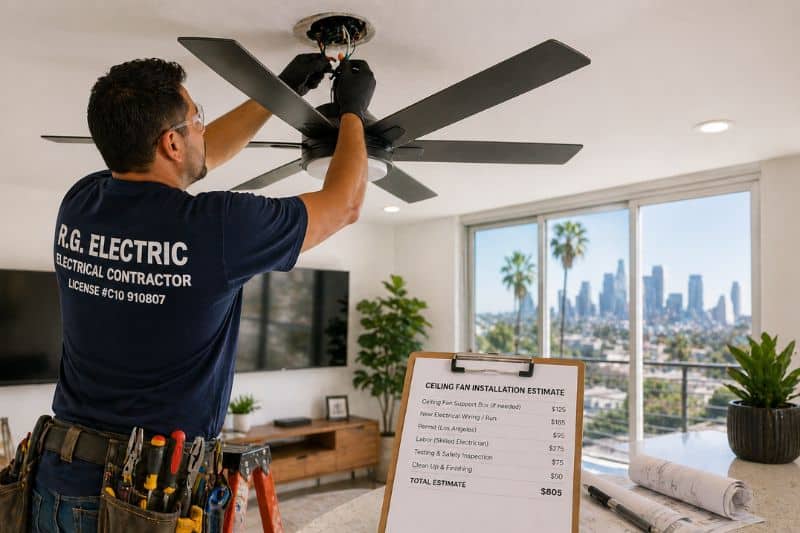
Why Your Ceiling Fan Installation Quote in Los Angeles Is Higher Than You Expected
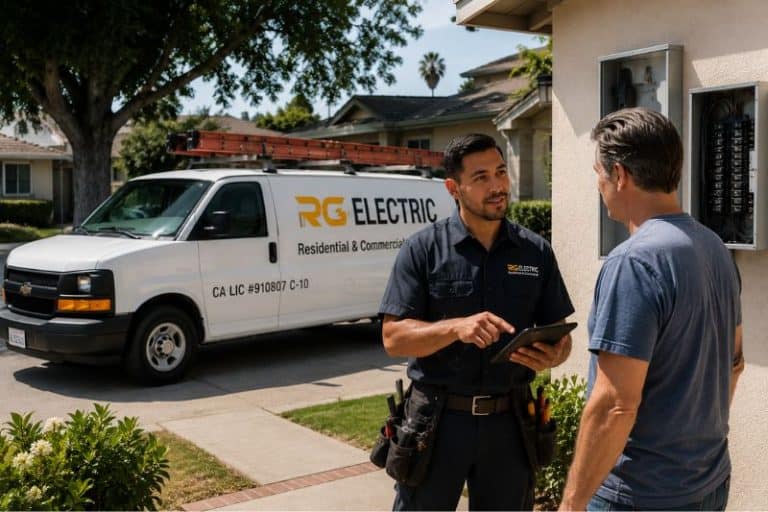
The ceiling fan is sitting in a box in the garage. The old one came down without much trouble. The new one looks straightforward. And then the quote from a licensed electrician comes back higher than expected, and the homeowner wonders what exactly is being charged for. RG Electric, licensed C-10 #910807, installs ceiling fans throughout Los Angeles for homeowners and property managers, and we have this conversation regularly. The short answer is that ceiling fan installation is almost never just swapping one fixture for another. This post explains what actually drives the cost, why the variables matter for safety and code compliance, and what to expect from the installation process so the quote makes sense before work begins.
The Junction Box Is the First Question
The single most common hidden cost in a ceiling fan installation is the junction box. The box that is currently in the ceiling — the one the old light fixture hung from — is very likely not rated to support a ceiling fan.
Ceiling fans are dynamic loads. They spin, vibrate, and shift weight as the blades rotate. A standard plastic outlet box rated for a light fixture can hold fifteen to thirty-five pounds of static weight. A ceiling fan in motion puts a very different kind of stress on that box — lateral force, vibration, and continuous mechanical load that a standard box is not designed to handle. Over time, a fan hung from an inadequate box works the box loose from its mounting, and eventually the fan falls.
Code requires a fan-rated box — either a brace-mounted box that spans between joists, or a fan-rated box secured directly to a joist — for any ceiling fan installation. If the existing box is not fan-rated, it has to be replaced before the fan goes up. Replacing the box requires access above the ceiling, which means either attic access or working through the ceiling opening, and it adds time and labor to the project. That is not a line item the electrician added to pad the bill. It is a required safety step that protects the homeowner from a fan that falls out of the ceiling.
Brace-mounted versus joist-mounted boxes
When there is no joist directly above the existing ceiling opening — which is common in rooms where the fan location was chosen for aesthetics rather than framing convenience — a fan-rated brace is installed through the existing opening. The brace expands to span between joists and is rated for fan loads up to fifty pounds or more depending on the model. No additional ceiling damage is required. When a joist is accessible directly above the opening, a fan-rated box is secured to it directly, which is a simpler installation. In either case, the result is a mounting that meets code and keeps the fan securely attached to the ceiling structure over the long term.
Whether the Switch Leg Supports a Fan with a Light
Most ceiling fans sold today include a light kit. Running the fan and the light independently — fan on, light off, or fan off, light on — requires either two separate switch legs running to the switch location or a wireless receiver inside the fan canopy that allows a single-switch location to control both functions.
In older Los Angeles homes from the 1940s through the 1970s, the ceiling box typically has a single switched hot conductor running to it — one switch, one circuit, one control. If the new fan has a light and the homeowner wants independent control of the fan and light from a wall switch, that single conductor is not enough. The options are to run a second conductor from the switch location to the ceiling — which involves fishing wire through finished walls and is priced accordingly — or to use a wireless remote or smart receiver that allows both functions to be controlled from the existing single switch.
The choice between those options depends on the homeowner’s preference for wall switches versus remote controls, the accessibility of the wall cavity, and the budget. What is not an option is ignoring the wiring constraint and installing a fan with a light on a single conductor — the result is that one function or the other cannot be switched independently, which defeats the purpose of having both. We present both options during the estimate so the homeowner can make an informed decision before work starts.
Vaulted and Sloped Ceilings Add Complexity
Los Angeles has a significant number of mid-century homes with vaulted, cathedral, and sloped ceilings — in the hills above Encino and Sherman Oaks, in ranch-style properties throughout the San Fernando Valley, and in post-war construction throughout the Westside. Ceiling fans on sloped ceilings require a downrod angled to keep the fan motor level and the blade tips at a safe distance from the ceiling surface.
Not all fans are compatible with sloped ceiling installation. Some require specific angled mounting kits. The blade tip clearance from the sloped surface has to be verified — the minimum clearance between blade tips and any surface, including a sloped ceiling, is seven inches. At steep slopes, the fan canopy angle and downrod combination has to be calculated to achieve both level motor orientation and adequate blade clearance simultaneously. Installation on a steeply sloped ceiling is more time-consuming than a flat ceiling installation, which is reflected in the labor estimate.
High ceilings and downrod length
Rooms with flat ceilings above ten feet also require a downrod to bring the fan blades to the correct operating height — ideally between seven and nine feet above the finished floor. The downrod length calculation depends on the ceiling height, the fan motor depth, and the desired blade height. A fan hung too close to a high ceiling circulates air poorly and delivers little of the comfort benefit that motivated the purchase. Getting the downrod length right requires knowing the actual ceiling height before the fan is ordered, not after it arrives. We confirm ceiling heights and recommend appropriate downrod lengths during the estimate visit so the homeowner orders the correct configuration before installation day.
Dimmer Switches and Fan Speed Controls Are Not Interchangeable
A standard light dimmer is not compatible with a ceiling fan motor. Using a standard dimmer to control fan speed does not work correctly — it produces humming, overheating of the motor windings, and premature motor failure. Despite this, it is one of the more common mistakes made when a homeowner or unlicensed handyman installs a ceiling fan.
Fan speed control requires either a fan-rated speed controller at the wall switch, or a remote receiver inside the canopy that handles both fan speed and light dimming independently. The wall switch type — whether it is a standard toggle, a fan speed controller, or a smart switch — affects what control options are available and how the wiring needs to be configured. Smart fans that integrate with home automation systems require compatible smart switches and may need a neutral wire at the switch location, which older homes frequently do not have at their switch boxes.
We identify the switch configuration and wiring availability at the switch location during the estimate so that the control solution selected actually works with the existing wiring. Discovering that the switch box lacks a neutral wire after a smart fan has been ordered adds a return trip and potentially a wiring addition to the project scope. Getting that information first keeps the project on schedule and on budget.
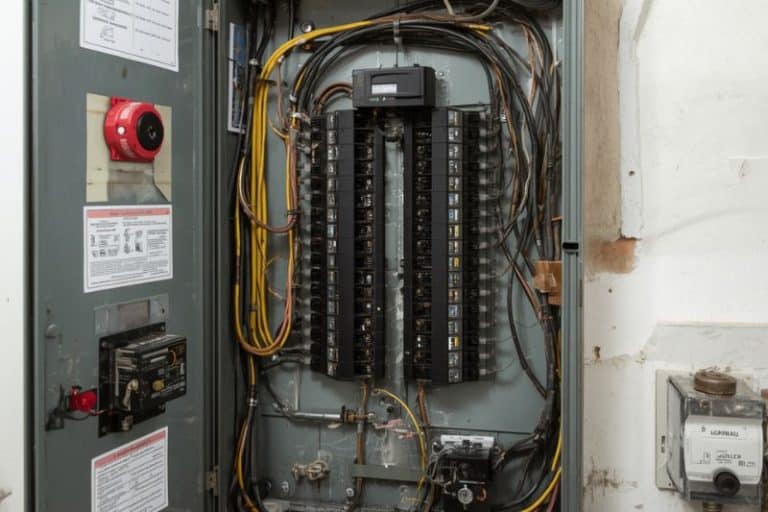
The Circuit Itself May Need Evaluation
Ceiling fans with light kits add load to the circuit they are connected to. In older homes throughout North Hollywood, Van Nuys, Reseda, and similar neighborhoods where bedroom and living area circuits are shared with multiple outlets and other fixtures, the added load of a fan with a light may put the circuit close to or at its rated capacity under normal use.
A circuit that is consistently running near capacity produces heat at connection points, accelerates insulation wear, and eventually produces nuisance breaker trips or, in older homes with original wiring, more serious problems. We evaluate the circuit’s existing load during the estimate when the installation is in an older home or when the customer mentions that the circuit already trips occasionally. If the circuit needs attention, addressing it during the fan installation is more efficient than treating it as a separate project later.
For homes where the wiring itself is the underlying issue — knob-and-tube wiring, aluminum branch circuits, or cloth-insulated wiring that has become brittle — a fan installation is an appropriate time to discuss a broader wiring evaluation. Our wiring services cover assessment and replacement of legacy wiring systems throughout Los Angeles, and identifying those conditions during a straightforward installation visit is genuinely useful information for the homeowner.
Outdoor Fan Installations Have Additional Requirements
Covered patios and outdoor living spaces in Los Angeles are where a significant number of ceiling fan requests originate — the climate makes outdoor living practical for most of the year, and a fan makes it comfortable during the warmer months. Outdoor fan installations have requirements that indoor installations do not.
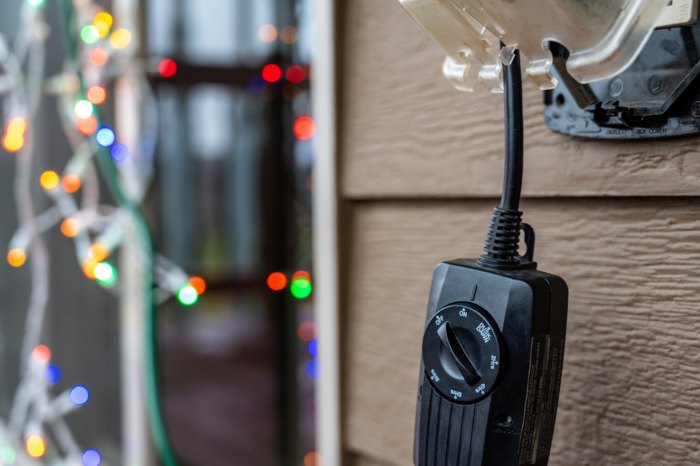
Wet versus damp ratings
Outdoor fans are rated for either damp or wet locations. A damp-rated fan is suitable for a covered patio where the fan is protected from direct rain contact. A wet-rated fan is required when the installation is exposed to direct precipitation — an uncovered pergola, an open deck, or any location where rain can reach the fan directly. Using a damp-rated fan in a wet location will result in motor and blade failure within one to two seasons, which is why the location assessment happens before the fan is specified, not after it is installed.
GFCI protection for outdoor circuits
Outdoor electrical circuits, including those serving ceiling fans on covered patios and pergolas, are required by California electrical code to be GFCI-protected. If the existing outdoor circuit is not GFCI-protected, bringing it into compliance is part of the installation scope. This is not optional — an outdoor circuit without GFCI protection is a code violation that will be caught during any inspection and creates genuine shock hazard when moisture is present. Our electrical outlets and switches services cover GFCI installation and circuit compliance as part of any outdoor electrical project.
What Happens When a Handyman Does the Installation Instead
Ceiling fan installation looks straightforward enough that it is one of the most common electrical tasks homeowners attempt themselves or hand to an unlicensed handyman. The risk profile of that decision is worth understanding clearly.
A fan hung from a standard light fixture box on a flat ceiling may appear stable for months. The failure mode is not immediate — the box gradually works loose under the vibration and lateral load of the spinning fan, and the failure eventually happens quickly and without warning. A ceiling fan falling from a ten-foot ceiling in an occupied room is a serious injury risk. The code requirement for a fan-rated box exists because this failure mode was documented repeatedly, not because the code writers were being overly cautious.
Beyond the mounting issue, handyman installations frequently involve incorrect switch wiring that bypasses independent fan and light control, standard dimmers used for fan speed control that damage the motor over time, and outdoor fans installed without GFCI protection on the circuit. None of these problems is immediately visible. All of them create either a safety risk, a code violation, or premature equipment failure — and when the homeowner goes to sell the property, unpermitted or non-code-compliant electrical work in visible locations is a disclosure issue that buyers and their inspectors will find.
What the Installation Process Actually Involves
A professional ceiling fan installation by a licensed electrician follows a consistent sequence. We assess the existing junction box and replace it with a fan-rated box if required. We verify the switch wiring configuration and identify what control options are available given the existing conductors. We confirm ceiling height and slope for correct downrod selection. We check outdoor location ratings and GFCI protection status where applicable. We review the circuit load before adding the fan.
The fan is assembled, the canopy is wired, the blades are balanced, and the controls are tested through their full range before we leave the site. The panel directory is confirmed to correctly identify the circuit. Any conditions identified during the installation that affect the broader electrical system — an inadequate box that revealed deteriorated ceiling wiring, an outdoor circuit without GFCI protection, an overloaded circuit — are documented in writing so the homeowner has a record of what was found and what was done.
The quote that comes back from a licensed electrician reflects all of that. It is not a simple swap — it is a professional installation that accounts for the building’s actual conditions and produces a result that is safe, code-compliant, and built to last as long as the fan itself does.
For immediate assistance or to schedule a professional evaluation, call RG Electric directly at (323) 521-5131.
Electrical work is hazardous. Consult a licensed electrician like RG Electric for ceiling fan installations, wiring evaluations, and code-compliant electrical work throughout Los Angeles.